
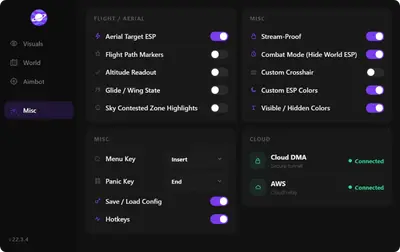
How to Set Up Aion 2 ESP for Sky Fights and the Abyss
A screen full of boxes is not the same as awareness. This is how to cut the noise down to the few markers that change a decision in a sky fight, and which options to leave off.
Default ESP settings are built to show you everything. That is fine in a quiet zone and awful in a forty player Abyss scrap where half the boxes belong to people you cannot reach and never will fight.
Good ESP configuration is mostly subtraction.
See Aion 2 cheats for every ESP toggle before you trim the list.
Start with what matters
Aion 2 fights move vertically. Anything that tells you about altitude and direction is worth more than anything that tells you about cosmetics.
Enable
- Faction tag, so you can tell an enemy from an ally above you
- Class, so you know if the target has a gap closer
- Distance
- Flying or grounded state
- Altitude readout
- Out of screen arrows
- Skeleton, for reading facing and momentum
Disable
- Nameplate, unless you are hunting a specific player
- Level, once you know the zone's range
- Head circle, redundant with skeleton
- Health bars on mobs in PvP zones
Faction colour coding does a lot of the work here. Set enemy factions to hot colours and your own to something cool and dim. When three factions are in one fight, that split is what stops you diving the wrong side.
Distance tuning is zone specific
Set max ESP distance to roughly the range at which you can still act. In a tight Rift that might be 80 metres. In open Abyss, 200 to 250. Beyond that you are reading information you cannot use and paying frames for it.
Set max world distance separately and shorter. Node and boss markers do not need to reach the horizon, and keeping them on a tight leash stops PvE clutter bleeding into PvP.
Use combat mode properly
Combat mode hides world ESP and leaves only players. Bind it and turn it on the moment a fight starts. It is the single biggest readability gain available and it costs nothing.
Turn it back off when the fight ends and you go back to gathering or questing.
Radar complements, it does not replace
The radar is for what is behind you. Players, bosses and nodes at a settable range, colour coded by faction, with adjustable zoom. Keep the range modest so it stays a rear-view mirror rather than a second overlay.
Do not run the radar at maximum zoom in a crowded zone. It becomes a smear.
Colours
Use a completely different palette for visible and hidden targets. A target in line of sight and a target through rock are not the same information, and you will be making that judgement dozens of times a minute.
Also avoid red for anything friendly. Red means enemy to almost everyone and fighting that instinct slows you down.
Stream proof and panic
If you stream or clip, enable the stream proof overlay. Bind the panic key and practise it. When a fight ends and you want a clean screenshot, one press should clear the screen, and you should not have to hunt for the bind under pressure.
Frame cost
Every marker is a draw call. Skeleton, out of screen arrows and long distances add up. If you are dropping frames in a raid, cut in this order: out of screen arrows, skeleton, max distance, then radar range.
The cheat is not the main cost on most machines, but a 40 player fight is not most situations.
Class specific notes
As an Assassin or Gladiator, distance and view direction matter most because you are closing. Skeleton tells you which way they are turning before they turn.
As a Ranger or Sorcerer, altitude readout and out of screen arrows carry the setup. You need the target's position relative to you before you commit a cast.
As a Cleric or Chanter, faction tag and health bar are the priority, because your job is picking out who is dying, not who is closest.
Save the config
Save your settings to a named slot per zone type. A dungeon config and an Abyss config are genuinely different tools, and rebuilding between them wastes the first five minutes of every session. Load the slot, then go.
The full option list is on the Aion 2 cheats page, and the aim settings guide covers the assist side of the same setup.